arrow_circle_down Designs
arrow_circle_down Subscribe
arrow_circle_down How to add to our Notebook Cover to make a Bible Cover with Straps
Suzanne has very kindly shared how she modified our In the hoop Notebook Cover to add straps and snap closure for her amazing Bible Cover.
Suzanne has also shared the embroidery files to create matching Straps
(for 6x11 hoop - or bigger)
If you have a smaller hoop, you could make your own straps on your sewing machine
Thank you so much Suzanne
When Suzanne shared her original Bible Cover on our Facebook Group, she had so many messages of interest. Suzanne has very kindly shared these photo Instructions.
This is version 2 of her Bible Cover which includes an additional pocket and pen holder

KREATIVE KIWI DESIGNS REQUIRED
 |
 |
| In the hoop Notebook Cover | Quilt Bag In the hoop |
PLEASE NOTE - SUZANNE HAS ADDED A DIFFERENT QUILTING STYLE TO HER VERSION, AND RE-SIZED OUR ORIGINAL FILE TO FIT HER OWN BIBLE
(Details are shared in her very detailed video)
UNLESS YOU HAVE YOUR OWN EDITING SOFTWARE, YOU WILL NEED TO CHOOSE FROM THE QUILTING STYLES AND SIZES INCLUDED IN THE KREATIVE KIWI IN THE HOOP NOTEBOOK DESIGN
Please watch this video first:
CLOSING FLAP AND STRAPS
Carrying on from the video
- Stitch the back of the Quilted Bag as per Quilted Bag Instructions
- Create your straps using Suzanne's Free Strap Designs
- (or make your own straps on your sewing machine, or use a thick ribbon as straps)
Suzanne has included them in the same hoop to save on Stabiliser (great idea)
Stitch strap placement line

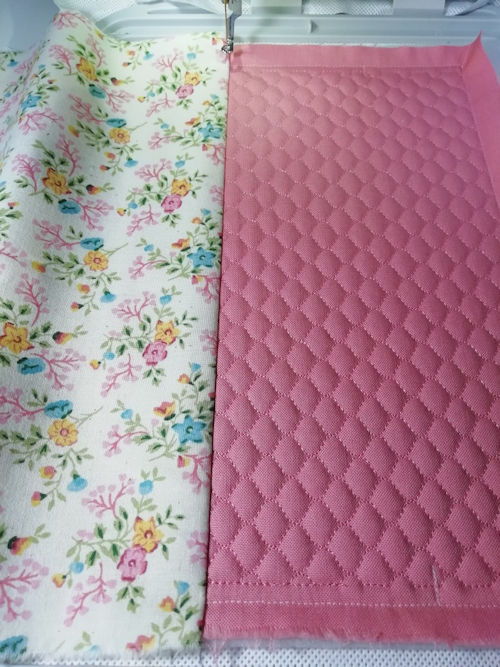
Place Backing Fabric under the hoop
Then Batting and strap fabric over the placement Lines

Stitch Color 2 to attach
Stitch Color 3 for the Quilting Pattern

Cut away Fabric Front and Back

Change your bobbin thread to match your Satin Stitch edging

OPTIONAL CREATE POCKET
Load Notebook Cover Front
Follow Steps 1-3 as per Notebook Instructions

Place your pocket Lining Piece with right side towards hoop
(Cut your Lining Piece the same size as your Notebook Cover front, plus an added 1 inch to the width)

Skip back to the first color to attach the fabrics (You'll have to stop machine from continuing with the rest of the outline)

Fold your Pocket Lining back to the right side

Skip machine forward to get the fancy top stitching (last color)

From the wrong side, trim your batting back to the 1/4 inch

Fold the Lining back to the wrong side, press, and you have a lovely bound edge pocket

CREATE NOTEBOOK BACK
- Stitch Notebook Back up to Step Three (Fabric attached and Quilting Completed)
- Suzanne's photos show the Pocket placed on top of the Notebook Back Panel
- Place your pocket in place on top of the Notebook Back
- Stitch Color 2 again to attach the pocket and stitch the placement markings.
- Mark Centre of Flap (Quilt Bag) and Centre of Notebook Cover
- Match marks and tape Flap in place as pictured

Tape Pen Holder in place, with straps either side of the flap
(right side of straps facing right-side of Notebook cover)


Continue on with Notebook Instructions from Step Four - Add side Flaps

Back Completed
ADD SPINE
Add Spine and join to the back, as per In the hoop Notebook Instructions

CREATE FRONT SECTION
Stitch Notebook Front as per Notebook Instructions up to Step 3
(Fabric attached, quilted, and embroidery design added)

Tape your 2nd strap in place to match Back Placement

Complete Front as per Notebook Instructions - Add Side flap Flap

Add Lining as per Instructions

If your Bible is quite heavy, it may pay to zig zag or re-inforce stitch on your sewing machine where your straps are joined


Note from Heather
Thank you so very very much for sharing these instructions Suzanne - I'm sure your amazing effort will be very much appreciated
| Top |

